Robust OTA Updates For Linux Devices, the Easy Way
Building a custom Linux OS for a device and integrating it with an OTA update solution can be a daunting task. Meet Rugix, the easy way to build a custom Linux OS for your device with builtin robust and secure over-the-air update capabilities. Rugix is an open-source tool suite aiming to simplify the development of embedded Linux devices and enable you to focus on what provides value to your users rather than system-level details.
This guide will walk you through all the steps necessary to build a bespoke variant of Debian with over-the-air update support, including delta updates, integrated with Memfault. Following this guide, you will also install a full system update via Memfault to your custom system running in a VM or on a Raspberry Pi. To follow this guide you only need a working Docker installation on either Linux or macOS. End-to-end this guide should take less than 30 minutes to complete, so let’s get started.
🎬 Listen to Maximilian on Interrupt Live talk about the content and motivations behind writing this article.
Table of Contents
Overview
Rugix consists of multiple tools that are designed to work seamlessly together but can also be used independently. For this guide, we will be using two of these tools: Rugix Ctrl, a powerful tool for over-the-air system updates and system state management, and Rugix Bakery, a flexible and user-friendly build system for bespoke Linux distributions.
While Rugix Ctrl supports other update scenarios, we will be doing full system updates based on a typical A/B setup with two redundant system partitions, A and B, where the device is running from one of the partitions at a time and updates are installed to the respective other partition. Of course, full system updates require you to build a system in the first place. To this end, we will be using Rugix Bakery, both to build an image for the initial provisioning of devices as well as to build Rugix update bundles for over-the-air updates via Memfault. While Rugix Bakery supports other binary distributions and even Yocto, we will keep it simple and use Debian.
The example presented here is
available as a GitHub template repository,
including a GitHub Actions workflow for building Rugix update bundles and
uploading them to Memfault as OTA update payloads. It also provides a
justfile to make running common tasks easier.
You can use this repository as a starting point for your own project.
Building an Image
As the first step towards building a system image, clone the template repository:
git clone https://github.com/silitics/rugix-template-memfault.git
The repository contains the following files and directories:
-
run-bakery: Shell script for running Rugix Bakery. -
rugix-bakery.toml: Rugix Bakery project configuration. -
env.template: Environment file template for secrets and development configurations. -
recipes: Recipes for system customization. -
layers: System layer configurations.
To make sure that everything works, run:
./run-bakery help
This will run an ephemeral Docker container with Rugix Bakery and should print usage instructions. If you run into any issues, please check out Rugix Bakery’s documentation for details.
Systems, Layers, and Recipes
Rugix Bakery’s build process revolves around two key concepts:
layers and
recipes. Typically, a
layer provides a root filesystem and a kernel for a system. Layers can be built
on top of each other, thereby reusing and extending an existing root filesystem
as well as any other build outputs that are part of the parent layer. In that
regard, layers are akin to
image layers in Docker.
A recipe describes additions and modifications to be made to a layer similar to
what you would put as a RUN step into a Dockerfile. A layer is then built by
applying the recipes specified in the layer’s configuration, optionally using a
parent layer as a base. The ability to layer customizations is particularly
useful when you need to build images and updates for different device variants,
also including images for testing in VMs, which all share a common base.
If you open the layer configuration file layers/customized.toml, you will find
that the customized layer specifies core/debian-bookworm as a parent. The
layer core/debian-bookworm is provided by Rugix Bakery and is built by freshly
bootstrapping a Debian system. The layer configuration also lists multiple
recipes for inclusion in the customized layer. The recipe memfaultd will
install memfaultd and the recipe hello-world will install a simple static
website into the system. If you like, you can open the file
recipes/hello-world/html/index.html and make some changes to it. You will
later be able to see these changes when serving the static site from a Raspberry
Pi or a VM.
In addition to the customized layer configuration, there are three other
configurations: customized-efi, customized-pi5, and customized-pi4. The
respective layers build upon the customized layer and apply additional
customizations necessary for generic EFI devices as well as for different models
of Raspberry Pi. These device-specific layers also include the
memfaultd-config recipe to configure memfaultd for the respective device
type, which also sets the
hardware version.
The project configuration file rugix-bakery.toml finally contains multiple
system declarations for different types of devices. In case of the template,
there are two system declarations, customized-efi-arm64 and
customized-efi-amd64, for 64-bit x86 and ARM devices following the EFI
standard for booting (usual commodity hardware). In addition, there is a
declaration for Raspberry Pi 4 and 5, respectively. Each system declaration
specifies the respective layer to use for that system as well as a target. The
target setting allows Rugix Bakery to build images that are directly bootable
on supported devices.
Preparation
If you are following along, you will need a Memfault account to generate a project key. It’s free under the evaluation license. If you don’t yet have an account, reach out to the Memfault team, and they will set you up with one! In the meantime, you can also follow along without a project key by setting it to some dummy value, e.g.,
dummy-key. You can then install updates locally directly throughrugix-ctrlas described in Rugix’s documentation.
For the next step, you will need the project key of your Memfault project. You will find that key in the project settings.
Now, before we build anything, copy the env.template environment configuration
to .env:
cp env.template .env
Then, open the .env file in an editor and insert the project key. In addition
to the project key, also insert your public SSH key as the DEV_SSH_KEYS. This
will allow you to later connect to a VM running from an image you build locally.
You can also set some further Memfault settings as required by the Memfault CLI.
This is not required but will come in handy later.
The environment configuration should never be put into version control as it may
contain secret information or local test keys (like your public SSH key) that
should not be leaked or end up in a production image (e.g., build with GitHub
Actions). The GitHub Actions workflow that comes with the template constructs a
.env file from the repository’s secrets and also uses it to inject build
metadata, like the
software version.
If you want to build systems for CPU architectures other than the host
architecture (CPU architecture of your machine), you will also need to configure
binfmt_misc for emulation. The
easiest way to do so, and as we are already using Docker anyway, is by running
the following command:
docker run --privileged --rm tonistiigi/binfmt --install all
This will allow you to build Linux distributions for a huge variety of different architectures.
Building an Image
With these preparations in place, let’s now bring a device to life. To this end, we need to build an image for initial device provisioning. Let’s say that you would like to build an image for Raspberry Pi 4, you can do that by running:
./run-bakery bake image customized-pi4
This command will take a while and first build the debian-bookworm root layer
by bootstrapping a fresh Debian. It will then apply the customizations of the
customized layer and afterward those of the layer configuration specific to
Raspberry Pi 4. In the end, you will get an image
build/customized-pi4/system.img that you can directly write to an SD card,
e.g., with Raspberry Pi Imager. Analogously, you can build an image for
Raspberry Pi 5 or for EFI-compatible devices using the respective system
declarations. The images for EFI-compatible devices can be written to an NVMe or
USB drive from which compatible systems can then boot.
Running a VM
If you don’t want to test the images with a physical device, you can also start a VM directly from within Rugix Bakery. To this end, run:
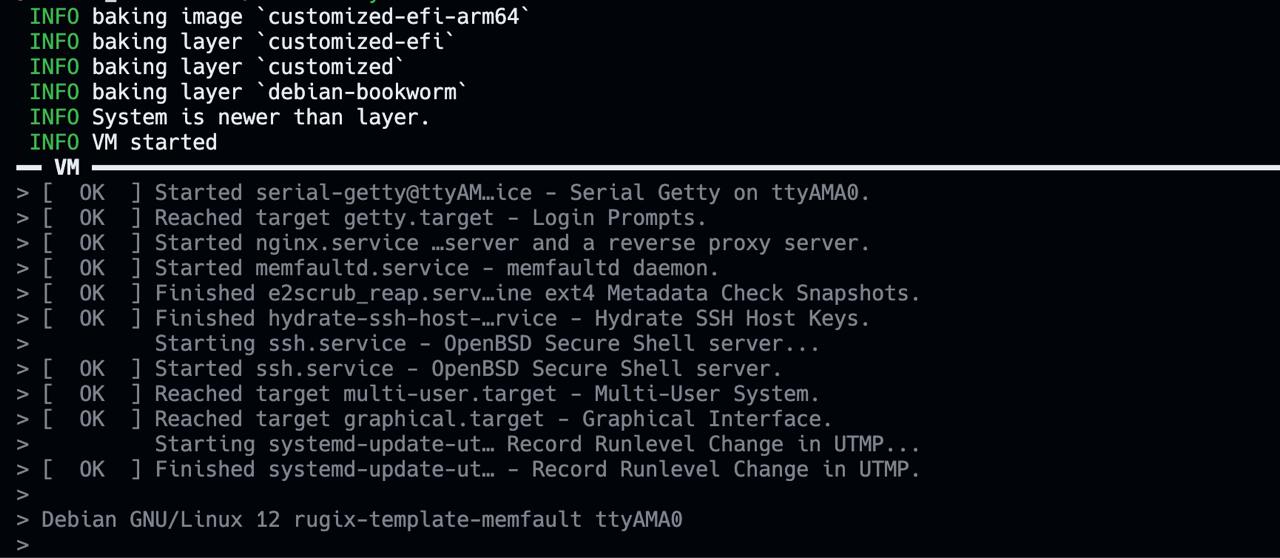
./run-bakery run customized-efi-arm64
You will then see the VM booting right in your terminal. Note that VMs only work for EFI-compatible systems, not for Raspberry Pi.
Device Provisioning
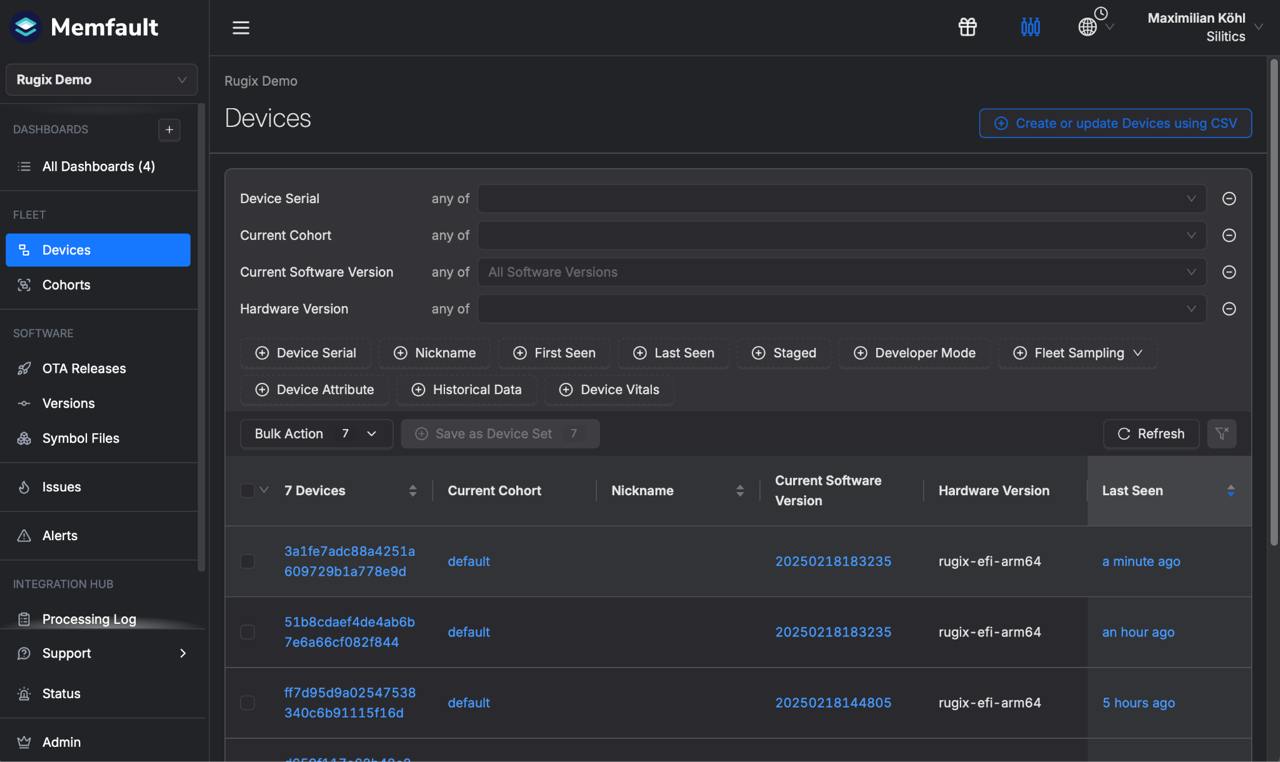
When you first boot a device from one of the images previously built, Rugix Ctrl will automatically create additional partitions and grow the existing ones to take advantage of the full storage capacity. Furthermore, as Memfault is integrated into the image with your project key, the device will also appear automatically in your Memfault project.
Connecting via SSH
As you included your public SSH key in the image, you can use SSH to connect to
the system, whether running on an actual device or in a VM. When running on an
actual device, use the device’s IP address or rugix-template-memfault.local to
connect to the device. When running a system in a VM, open a new terminal (in
addition to the terminal with the run command stated above) and run:
ssh -p 2222 -L 8080:localhost:80 root@127.0.0.1
When invoked with the run command, run-bakery will forward SSH from the VM
to your host on port 2222. So, this command will give you a shell in the VM.
The SSH command will also set up port forwarding for HTTP so that you can now
view the webpage that you customized earlier in your browser by navigating to
http://localhost:8080. If you are running on physical hardware, you can also
view the webpage served from the device by navigating to the device’s IP address
or http://rugix-template-memfault.local. Should your device or VM not connect
to Memfault, you can use the SSH connection to debug any issues by inspecting
the log of the memfaultd service.
OTA Updates
In addition to system images, Rugix Bakery can build Rugix update bundles for OTA system updates. Rugix update bundles are based on a format specifically engineered for efficient and secure over-the-air updates. The format provides built-in support for cryptographic integrity checks, compression, and adaptive delta updates.
To actually see an effect of the update, go ahead and make some more changes to
the static webpage by modifying the HTML in
recipes/hello-world/html/index.html. Then, to build an update bundle, e.g.,
for the customized-efi-arm64 system, run:
./run-bakery bake bundle customized-efi-arm64 --without-compression
We use --without-compression here to not waste our time waiting for the
compression. The command will build an update bundle
build/customized-efi-arm64/system.rugixb that can then be uploaded to Memfault
with:
source build/customized-efi-arm64/artifacts/memfault-vars
source .env
memfault \
    --project $MEMFAULT_PROJECT_SLUG \
    --org $MEMFAULT_ORG_SLUG \
    --org-token $MEMFAULT_ORG_TOKEN \
    upload-ota-payload \
    --hardware-version $MEMFAULT_HARDWARE_VERSION \
    --software-type rugix-debian \
    --software-version $MEMFAULT_SOFTWARE_VERSION \
    build/customized-efi-arm64/system.rugixb
When building the system, Rugix will produce a file memfault-vars that
contains the Memfault hardware and software version as written into the image
and update bundle. The above shell snippet also sources the .env file, where
you can put the credentials for the memfault CLI. If you have just
installed, you can alternatively run just upload <system> to upload the update
bundle as an OTA payload to Memfault.
To build update bundles for the other systems, proceed analogously.
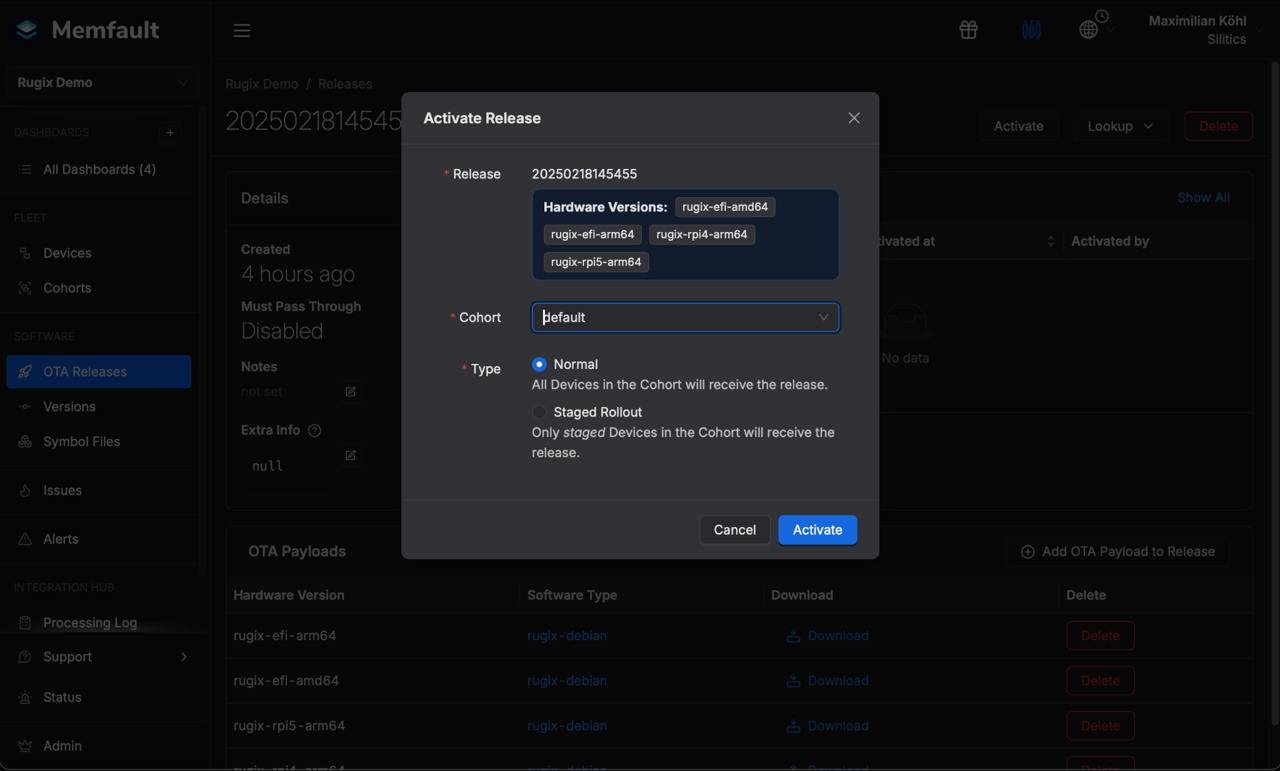
To deploy an OTA update to a device or to the VM started earlier, you need to activate the respective release within Memfault.
The recipe memfault-ota-rugix installs a systemd service that checks every
six hours whether there are updates available. If an update is available, it
will download and install it. To check for an update immediately and without
waiting for six hours, connect via SSH to the system (as explained above) and
run:
memfault-ota-rugix
Adaptive Delta Updates
By default, the memfault-ota-rugix update script installed by the
memfault-ota-rugix recipe will create
block indices for adaptive delta updates
before installing the update. Rugix Ctrl will then use HTTP range requests to
only download those parts of the update that actually changed over the old
version. As a result, you should see that the update script only downloaded a
fraction of the update, as not much changed. Rugix Ctrl does that automatically
and without the need to build specific delta updates to go from one version to
the other.
Here is an example showcasing the effectiveness of such updates based on an update where we changed the static website as described above:
root@rugix-template-memfault:~# memfault-ota-rugix
Boot Flow: grub-efi
Active Boot Group: a
Default Boot Group: a
Slot "boot-a": active
Slot "boot-b": inactive
Slot "system-a": active
Slot "system-b": inactive
 INFO installing update to boot group "b"
 INFO running hooks for "update-install/pre-update"
Installing bundle payload 0 to slot boot-b
Installing bundle payload 1 to slot system-b
 INFO downloaded 9.5% (32.0851011MiB/337.877757MiB) of the full bundle
 INFO running hooks for "update-install/post-update"
 INFO setting spare flag for Grub boot flow
As you can see in this example, Rugix only downloaded around 10% of the update
bundle. In this case, the root filesystem has a size of 1GiB in addition to a
60MiB boot partition, however, installing the update only required downloading
32MiB, so around 3% of the real system size. This is due to the use of
compression (the bundle has not been built with --without-compression) and the
use of adaptive delta updates with block indices.
By default, Rugix uses a rolling hash to divide any update payloads into
variable sized blocks with an average block size of 64 KiB.1 For each
such block, it will compute a hash and will then compress the block. The same is
done to local filesystems (and any other files updated through Rugix). When
installing an update, Rugix will use locally available blocks identified by
their hash instead of downloading them. The way in which Rugix divides payloads
into blocks is configurable with fixed and variable-size options where variable
sizes have the advantage that they also work in the presence of small insertions
not aligned to block boundaries.
Note that there is a tradeoff here. A smaller block size means that the delta update can be more selective in terms of blocks and thereby reduce the download size. However, smaller block sizes also lead to worse block-wise compression, increasing the download size. Depending on your update scenario, you may need to empirically evaluate different options to find an optimal solution. Furthermore, to be effective, builds should be mostly reproducible, thereby reducing changes to those parts of a system that are significant for an update. While Rugix can not currently build systems fully reproducibly, we are actively working on this functionality – which will then also make adaptive delta updates even more efficient.
Committing an Update
After installing an update and verifying that it indeed works as expected, it
needs to be committed. This is done through the command
rugix-ctrl system commit. The template includes the recipe
rugix-extra/rugix-systemd-auto-commit which installs a systemd service
automatically committing to the presently booted version. You can add
pre-commit hooks to Rugix in
order to ensure that Rugix will only commit to a new version, if this version
has been verified to be working.
Conclusion and Outlook
Congratulations, you have successfully set up Rugix Bakery, customized your Debian-based system, built images for different devices, and learned how to install over-the-air updates through Memfault! Rugix is designed to simplify the development of embedded Linux devices, making it easier for you to innovate and deploy reliable systems.
By default, Rugix also comes with a state management feature that is designed to prevent system corruption by accidental state while making it easy to persist any important data. Among other things, the state management feature sets up a writeable overlay (using OverlayFS) over a read-only root filesystem, which is recommended to ensure that it always stays in a known-good state. Any changes made to the overlay that are not explicitly persisted, through Rugix Ctrl’s state management feature or otherwise, will thus be discarded when the device boots.
While this guide has covered the basics, there is much more to learn and explore. I encourage you to dive deeper into both Rugix Bakery’s and Rugix Ctrl’s documentation to discover additional functionalities and best practices. The documentation also includes a comparison to other tools such as RAUC or SWUpdate.
See anything you'd like to change? Submit a pull request or open an issue on our GitHub
References
 Maximilian Köhl is the the creator of the open-source project Rugix and the founder of Silitics, a software development and consulting firm focused on reliable software for embedded systems.