Practical Zephyr - Zephyr Basics (Part 1)
This is the start of a new article series about Zephyr’s basics: It will walk you through Zephyr’s build and configuration systems West, Kconfig and devicetree.
Yet another Zephyr series?
Zephyr’s documentation aside, several very good article series exist already, e.g., the “Getting Started with Zephyr” series by Mohammed Billoo, or the Zephyr notes by Abhijit Boseji. Nordic Semiconductor also launched its DevAcademy, which contains a great course on the nRF Connect SDK Fundamentals: Since the nRF Connect SDK is based on Zephyr, this course also teaches about Zephyr.
So why another article series, and what’s different in this one?
When I first started looking into Zephyr, the learning curve felt overwhelming. Even as an embedded developer with a decent amount of experience, understanding key concepts and tools like Kconfig or devicetree for creating even a simple application had me chasing down the rabbit hole, following link after link after link, night after night - and it was exhausting. The existing article series would only brush over core concepts like Kconfig and devicetree and leave me with more questions than answers; I still needed to understand those tools since I had no previous experience with them.
What I’m trying to achieve with this article series is the following:
If you’re working a full-time job and would still like to get started with Zephyr but don’t have the energy to set up your environment to dive deeper into the docs, this article series will guide you through the Zephyr basics. Of course, you’ll learn most if you follow along with programming, but all code, including snippets of generated code and build logs, are included in the articles of this series. Thus, even just reading this series should give you a good idea about how Zephyr works.
After this series, you should understand Zephyr’s build and configuration tools. The learning curve flattens, and you can continue learning without getting lost in Zephyr’s documentation.
👉 Find the other parts of the Practical Zephyr series here.
Note: This series is not for you if you’re not interested in details and how things work but instead want to use Zephyr. We’ll go through generated code and configuration files and learn _devicetree from first principles! Also, if you’re experienced with Linux and already know how Kconfig and devicetree work, the articles of this series are just not for you.
🎬 Listen to Martin on Interrupt Live talk about the content and motivations behind writing this article.
Table of Contents
Series outline
As mentioned, this series covers “Zephyr’s basics”, so what is it that we’ll explore in detail?
Setup
First, we walk through the basics of installing Zephyr and creating a minimal skeleton application. We’ll see how to compile, flash, and debug an application skeleton and how Zephyr’s West tool fits into this. We’ll improve this setup in a later article, leveraging the true potential of West.
Kconfig
In our skeleton application, we’ll already stumble upon the configuration tool Kconfig. We’ll now see how it works and how to explore, modify, and persist so-called Kconfig symbols, and will create our application-specific symbol. Since Kconfig is also used to configure build settings, we’ll see how to use Kconfig for specifying build types.
Devicetree basics
Zephyr uses a tree data structure called devicetree to describe hardware: All supported microcontrollers and boards are represented by a set of devicetree sources, which use their syntax. First, we’ll skim through some device tree files in Zephyr and then create our files to explore the devicetree syntax.
Devicetree bindings
After understanding the devicetree syntax, we’ll now use so-called bindings to add semantics and, therefore meaning to our devicetree. Only via devicetree bindings, Zephyr knows how to translate the provided devicetree into source code. Creating bindings for our nodes, we’ll look at the generated output, and finally how we can access it via the Zephyr devicetree API.
Workspaces
Throughout this article series, for the sake of simplicity, we’ll mostly use so-called freestanding applications. Such applications require Zephyr’s sources to be installed outside of your application. For professional applications, Zephyr’s West tool supports so-called workspaces: In workspaces, all sources, their location, and their versions are specified in a manifest file that is used by West to populate the workspace, eliminating references to files outside of the workspace. We’ll see how to create a minimal workspace application using West.
This is where the journey ends. After this series, you should find it easy - or at least easier - to explore, understand, and apply advanced concepts such as:
- application version management
- using the actual Zephyr operating system and its communication primitives,
- creating custom device drivers or integrating a custom board,
- using integrated bootloaders such as Mcuboot,
- testing Zephyr applications, e.g., using its Twister test runner,
- running static code analysis with the integrated code checker,
- and many more …
… but we won’t cover any of the above. All example code used throughout the articles is available in the practical-zephyr GitHub repository.
Prerequisites
You should be familiar with embedded software since we won’t cover the basics. Some knowledge in using build systems such CMake doesn’t hurt but is not required. If you don’t know what Zephyr is, look briefly at the introduction in the official documentation.
The practical examples in this series use Nordic’s nRF52840 development kit. If you don’t have such a board, don’t worry. You should be able to follow along using most of the boards in Zephyr’s long list of supported boards - or using an emulation target. However, we won’t cover using emulation targets in this article series. Most of the content of this series does not require any hardware; we’ll just compile the project for a specific board for simplicity.
Whenever relevant, we’ll use Visual Studio Code as the editor of choice. However, using VS Code is, of course, entirely optional and not required at all. Only in certain sections, e.g., debugging, we’ll show how using VS Code and some plugins can make your life easier - and we won’t cover any other editor.
We won’t assume any operating system, but - for the sake of simplicity - we’ll be exclusively using Linux shell commands. Windows users should have a “bash-compatible” environment - or WSL - installed. We won’t jump through the hoops of creating Windows-compatible shell scripts, batch files, or other atrocities.
Disclaimer
Several years have passed since this article series was first published. In an effort to keep things at least somewhat up to date, this article series has been updated to reflect more recent versions of Zephyr and the nRF Connect SDK, as well as the corresponding tools. Even though I tried really hard to update everything, you might still stumble upon some paths that might have been moved or files that are now named differently. If you happen to find mistakes, don’t hesitate to make a pull request for the Interrupt blog.
Installation
Let’s get started - with a shortcut. Installation and toolchain management is - and probably always will be - a very biased topic. This article series is about something other than solving that problem. Therefore, I’m deliberately choosing a shortcut: We’ll download “all things Zephyr” using Nordic’s nrfutil command line tool instead of following the complete installation procedure. This is optional but convenient.
Note: Those of you who are coming back to this series might notice that I’m no longer referring to Nordic’s toolchain manager. The toolchain manager is deprecated and is replaced by
nrfutil. Also, Zephyr’s West tool got a brand newsdk-installextension command to install the Zephyr SDK toolchain. This extension command, however, is not available in Nordic’s nRF Connect SDK. Refer to [Zephyr’s Getting Started][zephyr-getting-started] guide for details.
Instead of using Nordic’s full-blown IDE solution, we’ll create a shell script to set up our terminal. This demonstrates some of the environment variables used by Zephyr and allows you to use a plain terminal to follow along.
Note: In case you want a “Zephyr only” installation without downloading Nordic’s software, feel free to follow the installation procedure in the official documentation - and I’ll meet you again in the next section!
As mentioned in the introduction, later in this series, we’ll see a much better approach where Zephyr’s sources will be pulled into our workspace rather than separately installed: The only thing you’ll need are the host tools documented in Zephyr’s getting started guide. For now, I’m using Nordic’s toolchain installer simply to have a running setup that we can use to explore Zephyr’s sources and tools.
Setup using Nordic’s nrfutil
Nordic provides the nRF Connect SDK for its microcontrollers. This SDK is based on Zephyr and, therefore, its version of it (plus some vendor-specific extras). Still, instead of having to go through all the installation steps of the getting started guide, it comes with its own very handy command line tool nrfutil to manage different versions of the SDK and thus also Zephyr. We’ll also use it as a reference when checking the necessary steps to set up a Zephyr environment.
The nRF Connect SDK also comes with a VS Code extension pack: We’ll see several of the extensions throughout this series but won’t use the fully integrated solution since we want to understand what’s going on underneath the hood. Go ahead and:
- Follow
nrfutil’s instructions to install the current toolchain, -
[optional] install the nRF Kconfig extension for
VS Code, -
[optional] install the nRF DeviceTree extension for
VS Code.
Note: If you like Nordic’s nRF Connect for
VS Codeextension pack, you can now also skip the nrfutil installation step and install the toolchain straight from withinVS Code.
If you’re not convinced and want to install the SDK manually, you can also have a look at the steps performed in the Dockerfile in the accompanying GitHub repository. Notice that this Dockerfile is tailored to the needs of this article series and is not a generic solution. If you want something more generic, look at Zephyr’s docker-image repository.
Loading the development environment
After installing nrfutil and its sdk-manager extension command (see below), you can install different versions of the nRF Connect SDK. E.g., to install the version 3.2.1 of the nRF Connect SDK, use the following commands.
$ nrfutil install sdk-manager
$ nrfutil sdk-manager install v3.2.1

$ nrfutil sdk-manager list
SDK Type  SDK Version  SDK Status  Toolchain Status
nrf       v3.2.1       Installed   Installed
However, when using Zephyr’s tools in your normal command line, you should notice that the commands cannot be located yet. E.g., this is the output of my zsh terminal when trying to execute Zephyr’s meta-tool West (we’ll see the tool later):
$ west --version
zsh: command not found: west
Nordic gives you several options to launch your development environment with all paths set up correctly using nrfutil:
# the following prints all environment variables used by the
# toolchain installation for the nRF Connect SDK version 3.2.1
$ nrfutil sdk-manager toolchain env --ncs-version v3.2.1

# the same command with the --as-script generates an output
# that can be used as a shell script
$ nrfutil sdk-manager toolchain env --ncs-version v3.2.1 --as-script

# the following opens a new terminal with the environment set up correctly
$ nrfutil sdk-manager toolchain launch --ncs-version v3.2.1 --terminal

# ... or you can launch within your existing shell
$ nrfutil sdk-manager toolchain launch --ncs-version v3.2.1 --shell
Since we want a better idea of what’s happening underneath it all, we’ll use none of the above options. Instead, we create our own setup.sh script based on what nrfutil generates when using env --as-script.
Analyzing the script generated by Nordic
First, generate an env.sh script using nrfutil, e.g., using the following command
$ nrfutil sdk-manager toolchain env --ncs-version v3.2.1 --as-script > env.sh
At the time of writing, the script configures the following variables when sourced:
-
PATHis extended by severalbinfolders containing executables used by the nRF Connect SDK (and Zephyr). -
GIT_EXEC_PATHandGIT_TEMPLATE_DIRare set to the versions used by the SDK. Git uses these environment variables for sub-commands and the default repository setup when using templates, e.g., for the initial content of your.gitignore. -
NRFUTIL_HOMEis set to the version ofnrfutilthat comes with the toolchain. Yep, installing the nRF Connect SDK usingnrfutilalso provides an installation of itself. This is due to some extension commands that are needed for handling targets that you’d otherwise need to install globally. -
ZEPHYR_TOOLCHAIN_VARIANT,ZEPHYR_SDK_INSTALL_DIR, andZEPHYR_BASEare Zephyr-specific environment variables which we’ll explain just now.
Creating a setup script
Instead of using the provided launch options, we’ll use our own minimalistic shell script to explore the ecosystem and get to know the most important environment variables. You can find the complete setup script in the root folder of the accompanying GitHub repository.
After installing a toolchain with nrfutil you should see a tree similar to the following in your installation directory, in my case /opt/nordic/ncs:
tree /opt/nordic/ncs --dirsfirst -L 2 -I downloads -I tmp
/opt/nordic/ncs
├── toolchains
│   ├── 322ac893fe
│   └── toolchains.json
└── v3.2.1
    ├── bootloader
    ├── modules
    ├── nrf
    ├── nrfxlib
    ├── test
    ├── tools
    └── zephyr
The toolchain - and therefore all required host tools - are installed in a separate folder toolchains, whereas the actual SDK is placed in a folder with its version name. We’ll make use of this to first set up our $PATH variable with a minimal set of bin directories from the installation:
ncs_install_dir=/opt/nordic/ncs
ncs_sdk_version=v3.2.1
ncs_bin_version=322ac893fe
shell_name=$(basename "$SHELL")

paths=(
    $ncs_install_dir/toolchains/$ncs_bin_version/bin
    $ncs_install_dir/toolchains/$ncs_bin_version/opt/nanopb/generator-bin
)

for entry in ${paths[@]}; do
    export PATH=$PATH:$entry
done
Note: Depending on whether or not you want to replace all binaries - including
git- with Nordic’s installation, append or prepend toPATH. In the above example, we append and thus use local installations over the installation provided by the toolchain installer, if available.
After sourcing this script, you should now have, e.g., Zephyr’s meta-tool West and CMake in your path:
$ source setup.sh
$ which cmake
/opt/nordic/ncs/toolchains/322ac893fe/bin/cmake
$ which west
/opt/nordic/ncs/toolchains/322ac893fe/bin/west
Only two environment variables are significant when configuring the toolchain:
-
ZEPHYR_SDK_INSTALL_DIRmust be set to the installation directory of the SDK, -
ZEPHYR_TOOLCHAIN_VARIANTselects the toolchain to use, e.g.,llvmor in our casezephyr.
Note: Yes, the inconsistent use of the term “SDK” is quite annoying. Nordic uses the term “SDK” to refer to its sources, whereas Zephyr uses SDK to refer to the toolchain. I’m used to Nordic’s terminology where an SDK also includes source code.
Once those environment variables are set, we can source the zephyr-env.sh that is provided by Zephyr itself, as shown below. This Zephyr environment script is the recommended way to load an environment in case Zephyr is not installed globally.
# continuing setup.sh from the previous snippet

# for the sake of completeness, also show that we use the version of `nrfutil`
# that comes with Nordic's toolchain installation.
export NRFUTIL_HOME=$ncs_install_dir/toolchains/$ncs_bin_version/nrfutil/home

export ZEPHYR_TOOLCHAIN_VARIANT=zephyr
export ZEPHYR_SDK_INSTALL_DIR=$ncs_install_dir/toolchains/$ncs_bin_version/opt/zephyr-sdk
source $ncs_install_dir/$ncs_sdk_version/zephyr/zephyr-env.sh
west zephyr-export
Instead of setting ZEPHYR_BASE manually as, e.g., done nrfutil, ZEPHYR_BASE is now set by the zephyr-env.sh script (we’ll see how ZEPHYR_BASE is used when building our application). In addition, this also allows using .zephyrrc files in your application root directory - a feature we won’t cover in this series.
The final command, west zephyr-export, is a “Zephyr extension command” that installs the required CMake packages that we’ll need in the next steps when using find_package to locate Zephyr’s sources in a CMakeLists.txt file.
That’s it for the environment; we can now create applications. One last time, this was just a warm-up to start with Zephyr. It is not required or recommended to use such a setup.sh script; it’s just one of many possibilities you have when bringing up your development environment.
Creating an empty application skeleton
Now that we have a working installation, we can start with the important parts of this article series. Before creating our first files, let’s review Zephyr’s supported application types.
Zephyr application types
Zephyr supports different application types, differentiated by the location of your application in relation to Zephyr’s sources
-
Freestanding applications exist independent of Zephyr’s location, meaning Zephyr is not part of the application’s repository or file tree. The relation with Zephyr is only established in the build process when using
find_packageto locate Zephyr, typically based on theZEPHYR_BASEenvironment variable. -
Workspace applications use a West workspace: For such applications, West is used to initialize your workspace, e.g., based on a
west.ymlmanifest file. West uses the manifest file to create complex workspaces: The location and revision are specified in the manifest file for each external dependency used in your project. West then uses this manifest to populate your workspace—like a very, very powerful version of Git submodules. - Zephyr repository applications live within the Zephyr repository itself, e.g., demo applications that are maintained with Zephyr. You could add applications in a fork of the Zephyr repository, but this is not very common.
The most common and easiest approach is to start with a freestanding application: You’ll only need a couple of files to get started. As with the nRF Connect SDK, Zephyr is configured via the environment in a known installation directory.
In more advanced projects, you typically want all dependencies in your workspace. You will, therefore, switch to a workspace application type: External dependencies will be cloned directly into your project by West to avoid depending on separate local installations. We’ll get to that at the end of this article series.
We’ll rely entirely on the freestanding application type.
A skeleton freestanding application
The steps to create an application from scratch are also documented in Zephyr’s documentation. We’ll simply repeat them here and add some explanations, where necessary. Start by creating the following skeleton:
$ tree --charset=utf-8 --dirsfirst
.
├── src
│   └── main.c
├── CMakeLists.txt
└── prj.conf
You should immediately notice that we’re using a CMakeLists.txt. Zephyr’s build system is based on CMake. You’ve read that right: Zephyr provides its own meta-tool West, which uses yet another meta build system CMake, which will, in turn, e.g., use make or ninja.
Note: You can find the complete application skeleton, including some additional comments, in the
00_basicsfolder of the accompanying GitHub repository.
West vs. CMake
West is Zephyr’s “Swiss army knife tool”: It is mainly used for managing multiple repositories but also provides Zephyr extension commands for building, flashing, and debugging applications. CMake, on the other hand, is used exclusively for building your application.
Since we want to learn how things work underneath, for the following steps, we’ll be using CMake first and circle back to West after exploring the build process.
Kconfig
Our application skeleton also has a very suspicious prj.conf file. This file must exist for any application, even if empty, and is used by the Kconfig configuration system. We’ll go into detail about Kconfig (and devicetree) later in this series.
For now, simply keep in mind that we’ll be using this configuration file to tell the build system which modules and which features we want to use in our application. Anything we don’t plan on using will be deactivated, decreasing the size of our application and reducing compilation times.
Sources
Aside from our build and configuration file, we’ve created a still empty src/main.c file. The convention is to place all sources in this src folder, but you might need a more complex setup as your application grows. For now, that’ll do.
Writing and building a dummy application
Source code
Our main.c file contains our application code. We’ll just provide a dummy application that does nothing but send our MCU back to sleep repeatedly:
#include <zephyr/kernel.h>

int main(void)
{
    while (1)
    {
        k_msleep(100U); // Sleep for 100 ms.
    }
}
Notice that this is a plain infinite loop and it doesn’t make any use of threads yet - something that you’ll change in a more complex application: In the end, it makes limited sense to use Zephyr without its operating system. For now, keep in mind that applications can operate without threads, though this severely limits the functionality provided by Zephyr.
Build configuration
Now we come to the heart of this first step towards Zephyr: The build configuration. In case you’re not familiar at all with CMake, there are several articles and even books about “Effective Modern CMake”: CMake has evolved significantly, and only certain patterns should be used for new applications. We won’t explain CMake here, but if you’re an experienced developer, you should understand the basics just fine when reading along.
Let’s go through the steps to create our CMakeLists.txt for this empty application:
cmake_minimum_required(VERSION 3.20.0)

set(BOARD nrf52840dk/nrf52840)
find_package(Zephyr REQUIRED HINTS $ENV{ZEPHYR_BASE})
-
cmake_minimum_requiredjust indicates the allowed CMake versions. Zephyr has its requirements and maintains its minimal required CMake version inzephyr/cmake/modules/zephyr_default.cmake. - The
setfunction writes the board we’re building our application for to the variableBOARD. This step is optional and can be specified during the build step as a parameter.nrf52840dk/nrf52840is Zephyr’s name for the nRF52840 development kit. - Then, we load Zephyr using the
find_packagefunction. In our setup script, we’ve exported theZEPHYR_BASEenvironment variable, which is now passed as a hint to thefind_packagefunction to locate the correct Zephyr installation.
Note: There are several ways to use the Zephyr CMake package, each of which is described in detail in Zephyr’s CMake package documentation. You can also have a look at the Zephyr CMake package source code for details.
As mentioned, setting the BOARD variable is optional and usually not done. The value for the BOARD can be chosen in different ways, e.g., using an environment variable, or passed as a parameter during the build. The Zephyr build system determines the final value for BOARD in a pre-defined order; refer to the documentation for the application CMakeLists.txt for details.
Note: Zephyr’s goal is to support multiple boards and multiple MCUs. Once we switch to using West for building, it makes sense to pass the board as a parameter and not specify it in
CMakeLists.txt. In case you’re having trouble remembering the exact board name, you can always dump the list of supported boards using the commandwest boards.
Now that Zephyr is available, we can go ahead and add the application:
project(
    EmptyApp
    VERSION 0.1
    DESCRIPTION "Empty zephyr application."
    LANGUAGES C
)

target_sources(
    app
    PRIVATE
    src/main.c
)
- The
projectfunction defines the name and settings of the application project. - Then, we simply need to add our sources to the
apptarget.
But wait. What’s this app target, and why don’t we need to specify an executable? This is all done within the Zephyr CMake package: The package already defines your executable and also provides this app library target which is intended to be used for all application code. At the time of writing, this app target is constructed by the following CMake files in the Zephyr project:
zephyr/cmake/modules/kernel.cmake
zephyr_library_named(app)
zephyr/cmake/modules/extensions.cmake
macro(zephyr_library_named name)
  set(ZEPHYR_CURRENT_LIBRARY ${name})
  add_library(${name} STATIC "")
  zephyr_append_cmake_library(${name})
  target_link_libraries(${name} PUBLIC zephyr_interface)
endmacro()
Building the application
With the CMakeLists.txt in place, we can build the application. There are several ways to do this and if you’re familiar with CMake, the below commands are no surprise. What we want to show, however, is the slight differences between using CMake or West when building your application. Let’s first use CMake:
Building with CMake
$ cmake -B ../build
$ cmake --build ../build -- -j4
Note: The GitHub repository uses subfolders for all example applications. Using a build directory
../buildlocated in the root of the repository allows an editor such asVS Codeto pick up the compile commands independent of the example that is being built. In case you’re usingVS Code, have a look at the providedsettings.jsonfile.
With this, the ../build folder contains the application built for the BOARD specified in the CMakeLists.txt file. The following command allows passing the BOARD to CMake directly and thereby either overrides a given set(BOARD ...) instruction or provides the BOARD in case it hasn’t been specified at all:
# Build for a specific board determined during build time.
$ cmake -B ../build -DBOARD=nrf52dk_nrf52832
Let’s try to build the application using West:
$ rm -rf ../build
$ west build -d ../build
WARNING: This looks like a fresh build and BOARD is unknown; so it probably won't work. To fix, use --board=<your-board>.
Note: to silence the above message, run 'west config build.board_warn false'
<truncated output>
Note: The default build directory of West is a
buildfolder within the same directory. If run without-d ../build, West will create abuildfolder in the current directory for the build.
The build seems to succeed, but there’s a warning indicating that no board has been specified. How is that possible? West typically still expects a “board configuration” or the --board parameter. The reason for this is simple: West is much more than just a wrapper for CMake and therefore doesn’t parse the provided CMakeLists.txt file - where we specified the BOARD. It just warns you that you may have forgotten to specify the board but still proceeds to call CMake.
Before looking another step deeper into West, comment or delete the set(BOARD ...) instruction in your CMakeLists.txt file.
Building with West
As mentioned, West needs an indication of which board is being used by your project. Just like plain CMake, this could be done by specifying the BOARD as an environment variable or by passing the board to west build:
# pass the board as argument
$ west build --no-sysbuild --board nrf52840dk/nrf52840 -d ../build
# or using an environment variable
$ export BOARD=nrf52840dk/nrf52840
$ west build -d ../build
Underneath, West sets up the build directory and then simply invokes CMake. Thus, everything build-related is still plain old CMake. The above builds run without warning.
Note: The
buildcommand is actually a so-called West extension command and is not built into West by default. You could thus, e.g., use West without Zephyr as a repository manager in a different context. Zephyr provides extension commands such asbuild,flash, anddebugin its own West extension such that applications can be built, flashed, and debugged in the same way, independent of, e.g., the debugger or programmer that is used. If you’re interested in how Zephyr’s extensions work, have a look atzephyr/scripts/west-commands.ymland the corresponding West extension scripts.
Note: Zephyr uses so called system builds by default. In simple words, system builds combine one or more builds into a hierarchical build, e.g., if you’re using a bootloader like
mcubootthen you can build the application and the bootloader together using system build. For the remainder of this article series you’ll find that we disable system builds using--no-sysbuild. We need to do this since we’ll be looking through files in our build folder and using system builds changes these paths significantly.
Once the build folder has been created using any of the above commands, it is no longer necessary to pass the board to West:
# in case the build directory exists already ...
$ if test -d ../build; then echo "build directory exists!"; fi
build directory exists!
# ... it is no longer necessary to specify the board:
$ west build --no-sysbuild -d ../build
Alternatively, we can use West’s build configuration options to fix the board in the executing terminal. These options are similar to environment variables but are configuration options only relevant to West. We can list the current West configuration options using west config -l:
$ west config -l
manifest.path=nrf
manifest.file=west.yml
zephyr.base=zephyr
The listed configuration options are part of West’s built-in configuration options and come from the West workspace configuration. Since we’re using a freestanding application, we’ll ignore these options and focus on our build settings. We can add a default board configuration to our settings as follows:
$ west config build.board nrf52840dk/nrf52840
$ west config -l
manifest.path=nrf
manifest.file=west.yml
zephyr.base=zephyr
build.board=nrf52840dk/nrf52840
# It is also possible to delete an option
#, e.g., using `west config -d build.board`
Note: The West configuration options can also be used to define arguments for CMake. This can be useful when debugging or when defining your own CMake caches, refer to the documentation for details.
Now, we can run west build in our current terminal without specifying a board.
$ west build --no-sysbuild -d ../build
Notice that CMake does not pick up West’s configuration options, so executing cmake -B ../build would fail. One last parameter for west build that is worth mentioning is --pristine: Just like the --pristine option for CMake, instead of deleting the build folder, you can also use the --pristine to generate a new build:
$ west build --no-sysbuild -d ../build --pristine
A quick glance at IDE integrations
In the prerequisites, we’ve promised that we won’t have a detailed look at IDEs - and we won’t. In this section, we’ll just have a look at VS Code and some information that is relevant for any type of editor. Let’s start with the editor-independent information:
Zephyr configures CMake to export a compilation database and thus produces a compile_commands.json file in the build directory:
zephyr/cmake/modules/kernel.cmake
set(CMAKE_EXPORT_COMPILE_COMMANDS TRUE CACHE BOOL
    "Export CMake compile commands. Used by gen_app_partitions.py script"
    FORCE
)
This compilation database essentially contains the commands that are used for each and every file that is compiled in the project. The database is not only used by tools such as clang-tidy but also by IDEs and their extensions, e.g., to resolve include paths.
E.g., VS Code has a C/C++ extension, which can be configured to pick up the provided compilation database as follows in VS Code’s settings.json:
.vscode/settings.json
{
  "C_Cpp.default.compileCommands": "build/compile_commands.json",
}
If you like VS Code and use Nordic’s MCUs, you can also have a look at their extension pack, which comes with a graphical devicetree and KConfig extension, debugging support, and much more:
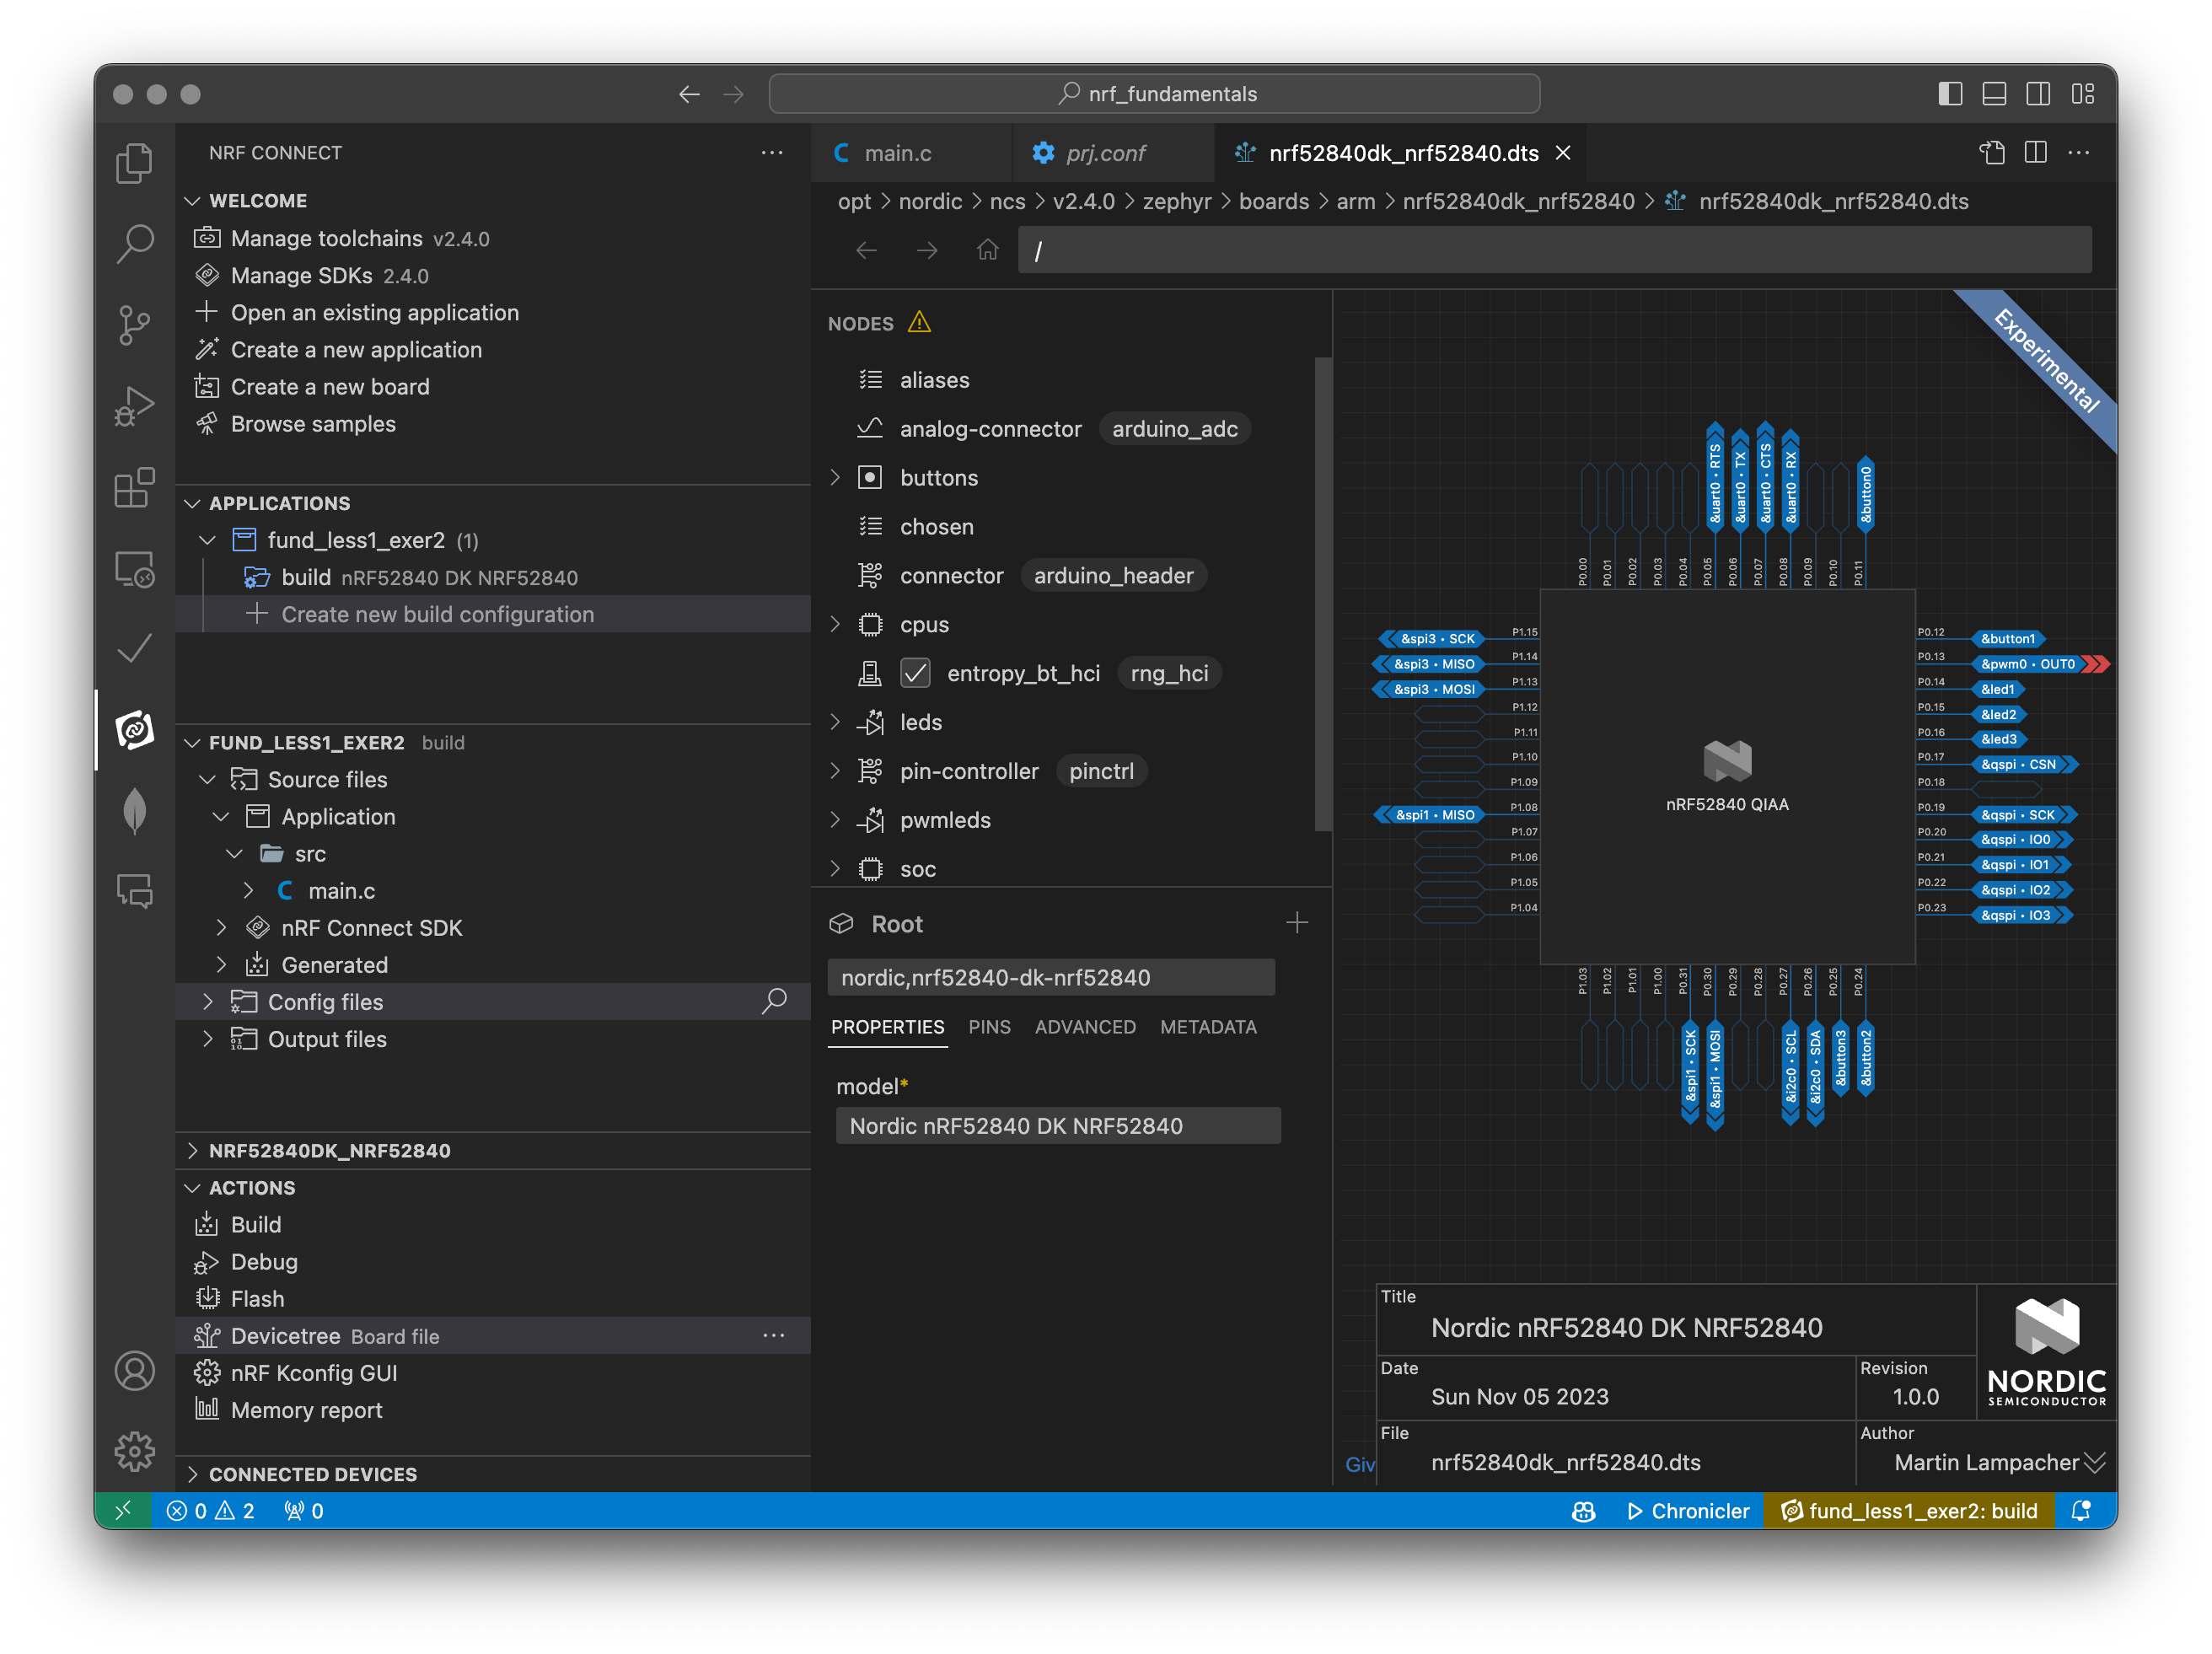
Note: Personally, I do not use the full extension pack since one key reason for using Zephyr is being able to use MCUs from any supported vendor. I also tend to stick to the command line since I want to understand the process and do not rely on buttons in an IDE. Also, the extension pack somewhat conflicts with the very popular CMake extension
ms-vscode.cmake-tools. But in general, Nordic did a great job of providing an easy way to develop applications with their extension pack. My only hope would be, that they’ll make the Kconfig and devicetree extensions usable without the full extension pack.
And that’s it about IDE integrations! Ok, almost, we’ll still see them every now and then in the article series.
Flashing and debugging
Having built our first freestanding application, let’s have a brief look at how we can flash and debug it on our target. We can do both using the flash and debug extension commands provided by Zephyr for West. With the development kit plugged in, all we need to do is run west flash to program the MCU (the parameter -d is necessary to select the correct build directory in case it isn’t located in the executing folder):
west flash -d ../build
-- west flash: rebuilding
ninja: no work to do.
-- west flash: using runner nrfjprog
Using board 123456789
-- runners.nrfjprog: Flashing file: ../build/zephyr/zephyr.hex
Parsing image file.
Verifying programming.
Verified OK.
Enabling pin reset.
Applying pin reset.
-- runners.nrfjprog: Board with serial number 123456789 flashed successfully.
Note: In case you haven’t followed the installation in this article but instead used your own setup, this step might not succeed: As you can see, West uses Nordic’s nRF Command Line Tool
nrfjprogto program the development kit. In case this tool isn’t available, the execution will fail. In general, flashing and debugging is always very target specific and you’ll need to ensure that the correct tools are installed.
Wait, so how does Zephyr know which USB device to flash and how to do this? West uses so-called flash and debug runners. In the above output, you can see that it selects Nordic’s nrfjprog command line tool as runner, which is, in turn, able to identify whether or not a board is connected to your computer. In case only a single matching board is present, it automatically programs that board.
The West extension command debug works similarly:
$ west debug -d ../build
-- west debug: rebuilding
ninja: no work to do.
-- west debug: using runner jlink
-- runners.jlink: JLink version: 7.66a
-- runners.jlink: J-Link GDB server running on port 2331; no thread info available
SEGGER J-Link GDB Server V7.66a Command Line Version

...

--Type <RET> for more, q to quit, c to continue without paging--
(gdb)
Here, West selected the J-Link runner since the development kit comes with a J-Link debugger. We end up with a gdb console which we can use to debug our application:
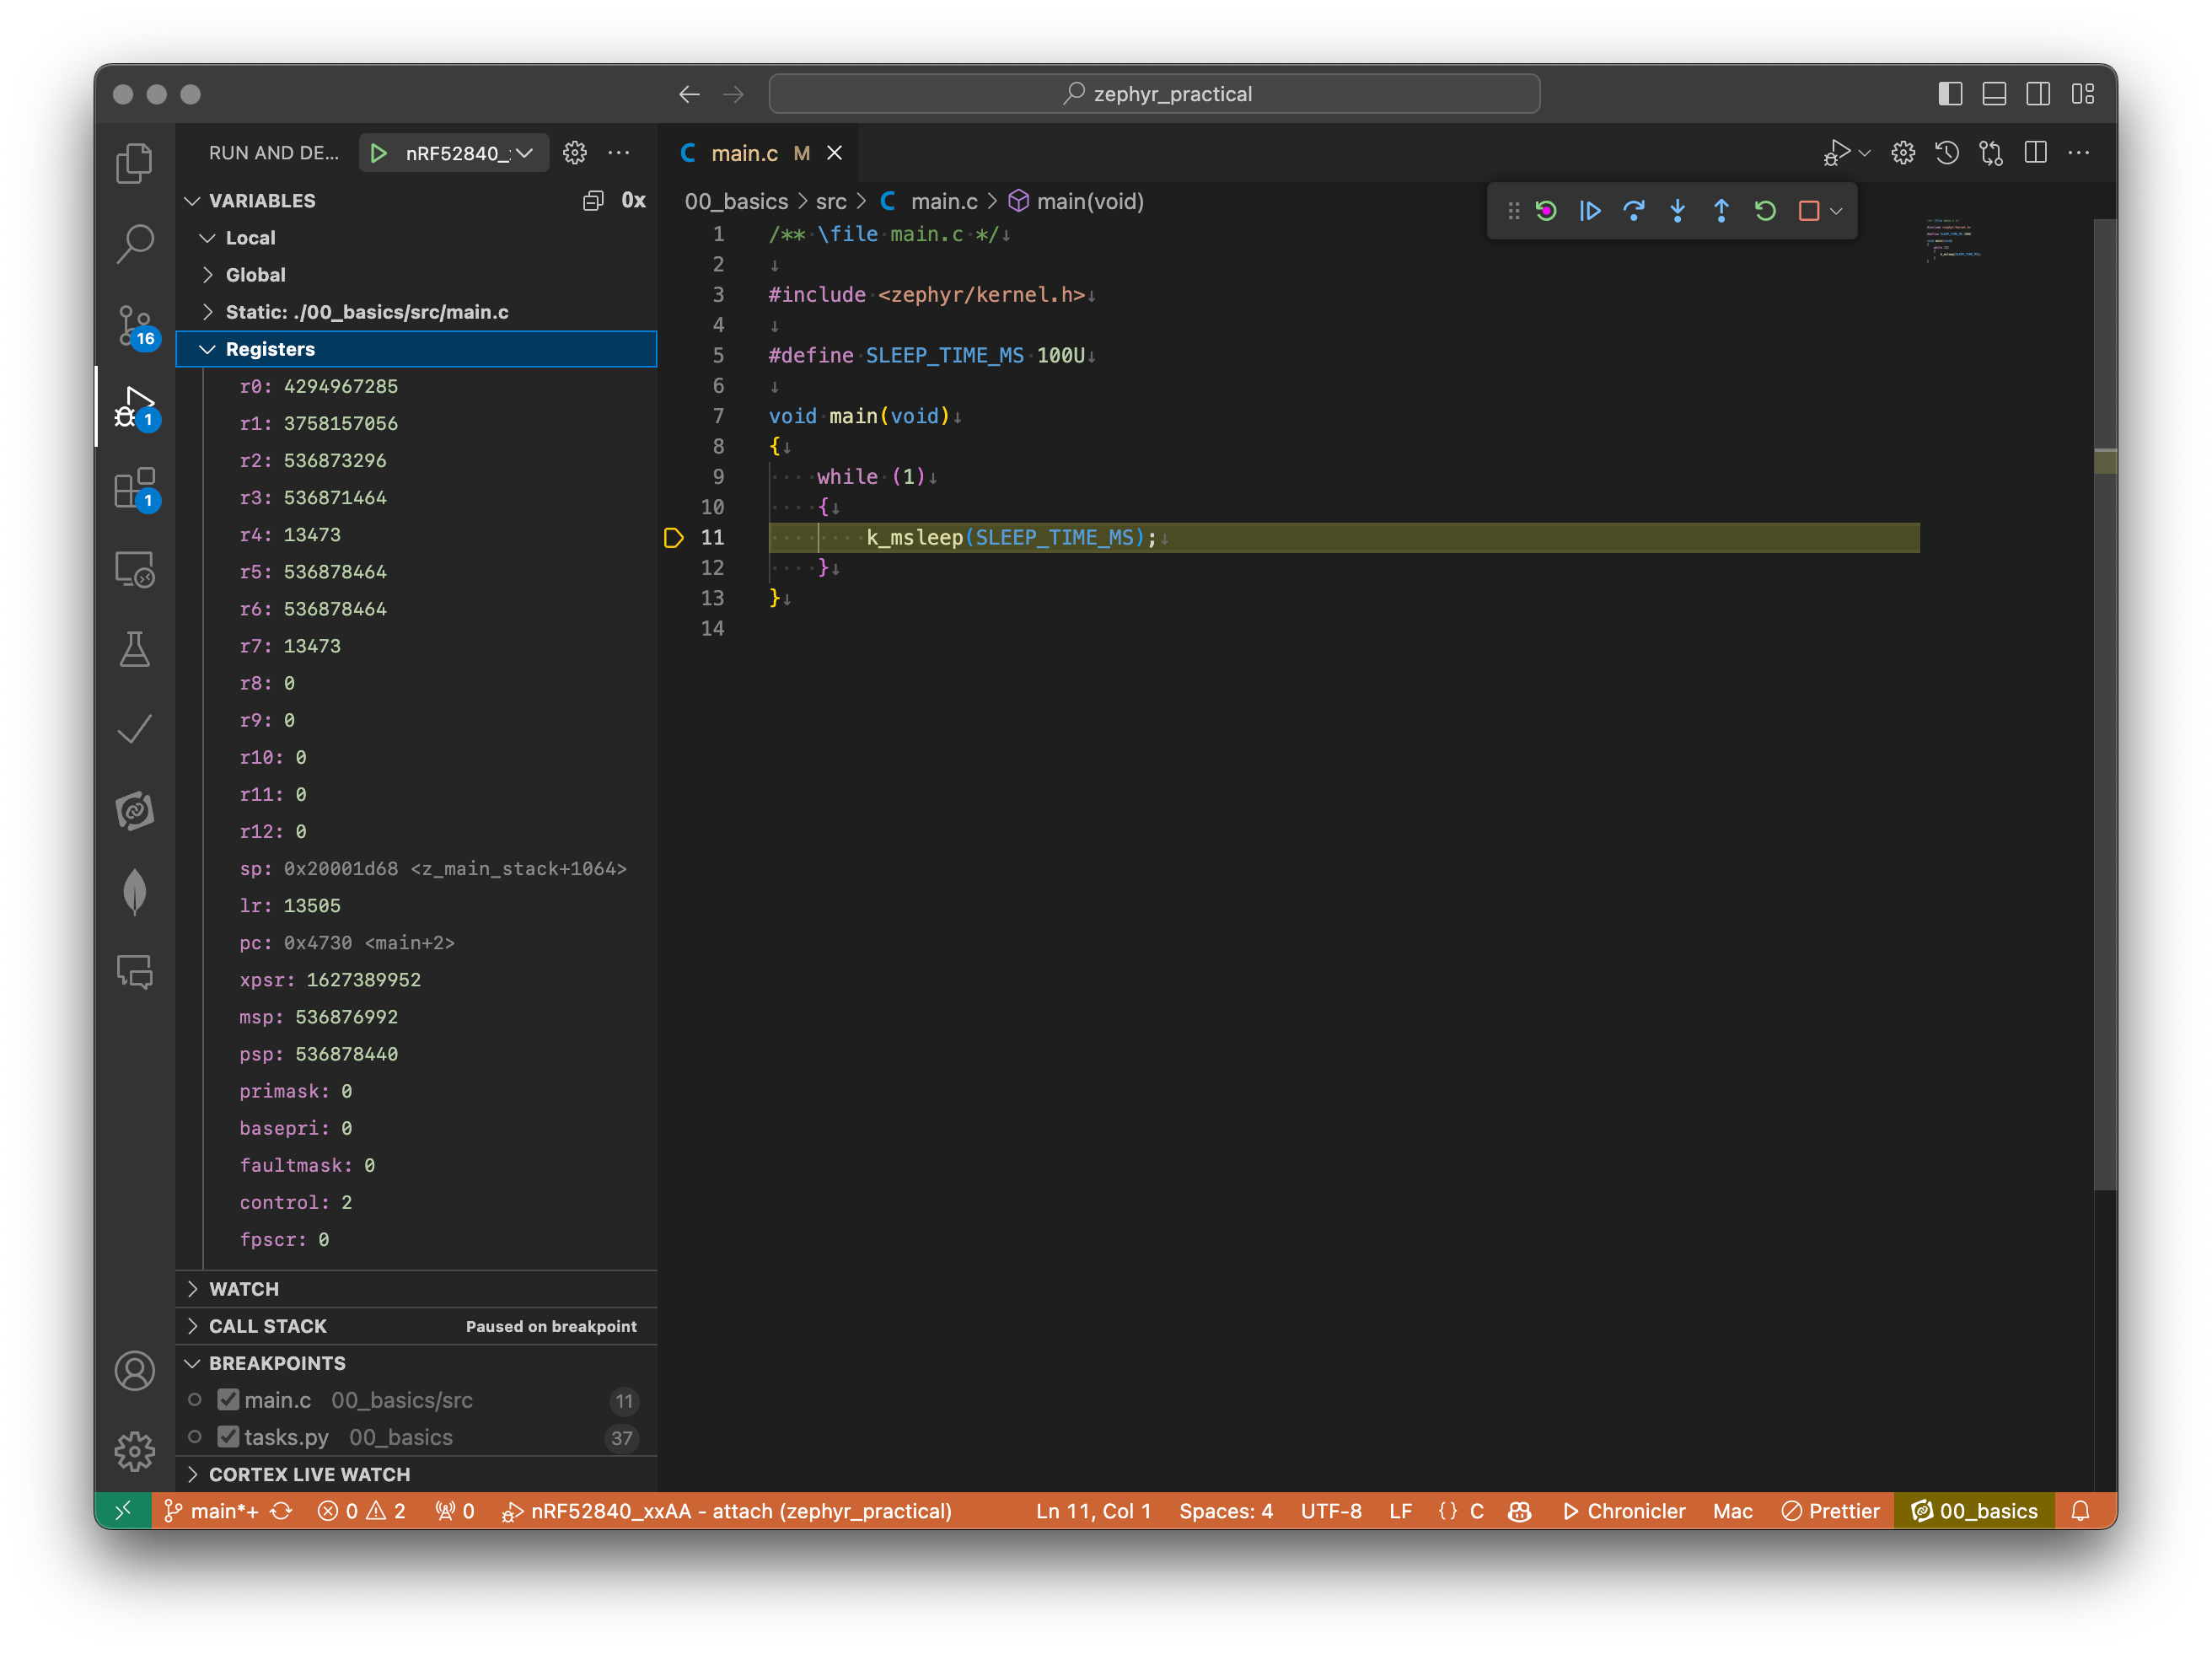
(gdb) break main
Breakpoint 1 at 0x4730: file /path/to/src/main.c, line 11.
(gdb) continue
Continuing.

Breakpoint 1, main () at /path/to/src/main.c:11
11              k_msleep(SLEEP_TIME_MS);
(gdb) next

Breakpoint 1, main () at /path/to/src/main.c:11
11              k_msleep(SLEEP_TIME_MS);
(gdb) next

Breakpoint 1, main () at /path/to/src/main.c:11
11              k_msleep(SLEEP_TIME_MS);
Debugging with gdb may be all you need, especially if you pair this with Python scripts.
Debugging ARM Cortex-M targets in VS Code
Aside from plain gdb, step debugging in your editor of choice is another very popular approach.
VS Code is becoming more and more prominent, which is why it is worth mentioning that debugging solutions exist that allow step debugging within the editor, e.g., via the cortex-debug extension for ARM Cortex-M microcontrollers.
Setting up debugging in VS Code is explained in the official documentation, and comes down to providing launch configurations in the JSON file .vscode/launch.json. The following is an example file that can be used to debug Zephyr applications on boards using the nRF52840 microcontroller:
.vscode/launch.json
{
  "version": "0.2.0",
  "configurations": [
    {
      "name": "nRF52840_xxAA - attach",
      "device": "nRF52840_xxAA",
      "cwd": "${workspaceFolder}",
      "executable": "build/zephyr/zephyr.elf",
      "request": "launch",
      "type": "cortex-debug",
      "runToEntryPoint": "main",
      "servertype": "jlink",
      "gdbPath": "/opt/nordic/ncs/toolchains/322ac893fe/opt/zephyr-sdk/arm-zephyr-eabi/bin/arm-zephyr-eabi-gdb"
    }
  ]
}
Note: Support for GDB comes out of the box with
VS Codeand could also be used instead of relying oncortex-debug. Also, in case you’re sourcingsetup.shbefore launchingVS Code, you can use the environment variable for thegdbPathsetting, e.g.,"gdbPath": "${env:ZEPHYR_SDK_INSTALL_DIR}/arm-zephyr-eabi/bin/arm-zephyr-eabi-gdb"
Your mileage, however, will always vary according to the MCU that you’re using, and there is no generic solution. Zephyr’s official documentation also comes with a dedicated section about debugging, and a separate section about flash & debug host tools. Pick your poison!
Another great resource about VS Code with Zephyr is Jonathan Beri’s presentation “Zephyr & Visual Studio Code: How to Develop Zephyr Apps with a Modern, Visual IDE” from the 2023 Zephyr Development Summit.
Conclusion
In this article, we installed Zephyr and its tools using Nordic’s nrfutil, and with it have a base environment that we’ll use in this series. Since your preference for development environments and installation for sure greatly varies, finding the matching solution will always be your own task. With the contents of the setup.sh script that we created in this article, you should have a good idea about what’s involved when creating your own setup.
Note: The example application skeleton created throughout this article is available in the
00_basicsfolder of the accompanying GitHub repository.
We then had a quick look at Zephyr’s application types and created a skeleton freestanding application, which we’ve compiled using CMake directly, and via Zephyr’s meta-tool West. We’ve seen how we can parameterize our build to pick a certain board and concluded, that it might be beneficial to use West over plain CMake - but you can always pick your preference.
We then brushed over the extension commands flash and debug that allow us to program the application to our board and debug it using gdb. Finally, we’ve had a quick look at a possible VS Code debugging integration.
Next up in line for this article series is Kconfig, which we briefly encountered when we created the minimum set of files for a freestanding application - which included a prj.conf file.
See anything you'd like to change? Submit a pull request or open an issue on our GitHub
References and further reading
The following are great resources when it comes to Zephyr and are worth a read or watch:
- “Zephyr and You: A Developer Environment for Newcomers” by Lauren Murphy from the Zephyr Development Summit 2022.
- “Zephyr & Visual Studio Code: How to Develop Zephyr Apps with a Modern, Visual IDE” by Jonathan Beri from the Zephyr Development Summit 2023.
- Zephyr’s docker-image repository if you want to containerize your builds.
- nRF Connect SDK Fundamentals, which also/mostly cover Zephyr, in Nordic’s DevAcademy.
- Zephyr’s own “Getting Started” guide in case you want to go down the rabbit hole yourself.
- “Effective Modern CMake” to get you started with CMake fundamentals.
- The “Getting Started with Zephyr” series by Mohammed Billoo in case you’re looking for an alternative series.
- Zephyr notes by Abhijit Boseji.
- Benjamin Cabé’s Blog, which includes a “Zephyr Weekly Update”.
In general, I can always warmly recommend browsing through the videos from the Zephyr Development Summit, e.g., the playlists from the 2022 and 2023 Developers Summits.
Finally, have a look at the files in the accompanying GitHub repository and I hope you’ll follow along with the future articles of this series!
 Martin Lampacher is a Freelance Embedded Engineer based in the Italian Alps.